Using Coveo Turbo with Coveo for Salesforce
Coveo Turbo provides the tooling to build and share components, as well as assemble entire projects.
This article explains how to use Coveo Turbo to build customizations that will be deployed to the Salesforce cloud. All the translation steps are currently manual.
To learn how to get started with Coveo Turbo, see Getting Started.
Table of contents:
Set up a project
Start by creating a new Turbo project - you can use the --page-layout option as a shortcut to specify a starter layout.
For a full list of available page layouts, see CLI Reference - Create a Page.
Ease the translation with the Coveo for Salesforce Local Development Kit
If you use any of the Salesforce layouts, then an adapter component will be bundled with the markup.
If you’re using a basic page layout, see Coveo for Salesforce Local Development Kit
View all content in your local environment
To ease development, you may need to use the viewAllContent argument locally so that templates you otherwise won’t see are accessible during development.
To enable this in your local environment, add the following piece of Javascript code within the DOMContentLoaded event handler found in the <head> section of the markup of your page.
Coveo.SearchEndpoint.endpoints['default'].options.queryStringArguments.viewAllContent = 'true';
Your local API key will require the View All Content permission to be granted, see Privilege Reference - View all Content Domain
Customizing Lightning Components
To integrate custom Javascript and CSS that is compiled by Turbo in the dist folder into a Lightning component, there are a few main steps that are necessary to get started:
Creating a Static Resource
Create a new static resource (preferably a zip type) in Salesforce with the compiled assets from Coveo Turbo.
When you use the build command, Coveo Turbo compiles your src folder and adds the final minified code to the dist folder. Here is the relative mapping of files you want to include in the static resource:
The static resource file does not have to have the same name as the output in the
distfolder, but for simplicity this guide will refer to them on a one-to-one basis.
| Local Path | Static Resource Path | Description |
|---|---|---|
| dist/index.min.js | index.min.js | The compiled and minified Javascript containing all components created within the project and installed with npm to the project wrapped in a function that the Salesforce library will execute. See Handling Javascript migrations between Turbo and a Static Resource. |
| dist/css/index.min.css | index.min.css | The compiled and minified CSS containing all styles created within the project and installed with npm to the project. |
| dist/images/* | images/* | A directory containing any images that are referenced in the solution. Note that any images referenced in css in the local environment will leverage the server’s routing to adjust the local path. Therefore, in an actual Salesforce environment, the compiled CSS file must be moved up a level in order to keep the relative image file mappings in tact. |
Handling CSS migrations between Turbo and a Static Resource
Copy the index.min.css from the dist/css folder to the static resource folder.
Handling Javascript migrations between Turbo and a Static Resource
The index.min.js file in the root of the static resource path must be wrapped in the following code snippet. Copy-paste the code from the dist/index.min.js within the code block as shown. Replace 'default' with the name of the visualforce component using this script if necessary.
window.coveoCustomScripts['default'] = function (promise, component) {
    // contents of dist/index.min.js replace this comment.
}
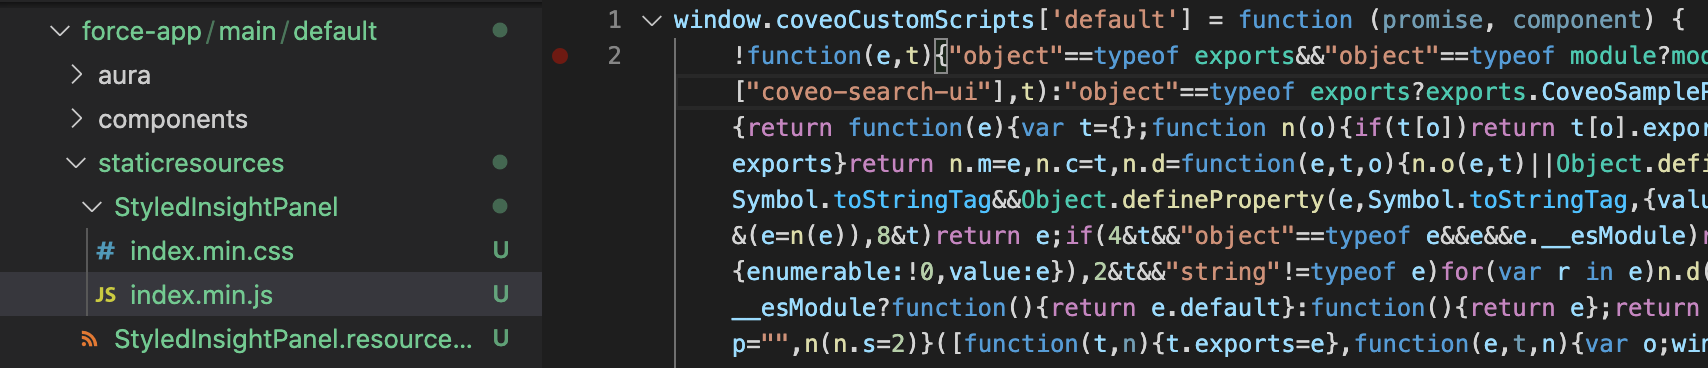
More concretely, the minified Javascript generated by Coveo Turbo will look similar to the following screenshot - which also replicates the default folder structure.

In order for this code to work within Salesforce, the block in the dist file will sit within a function call which returns a promise.
Wrapping the Lightning Coveo component to include Static Resources
Create a custom lightning component to wrap the out of the box Coveo for Salesforce lightning components and add references to your static resource.
For more information on creating a custom lightning component to wrap an out of the box component, see Integrating Coveo Components in a Custom Lightning for your community
For a reference of available components to wrap, see Lightning Components
Within the component file, you will want to include the following code snippet to add the styles. Replace __RESOURCE_NAME__ with the name of your static resource.
<ltng:require styles="{!$Resource.__RESOURCE_NAME__ + '/index.min.css'}"/>
Coveo’s Aura components include a parameter called customScripts which permit additional Javascript to be executed within that context. Replace __RESOURCE_NAME__ with the name of your static resource.
customScripts="{!$Resource.__RESOURCE_NAME__ + '/index.min.js'}"
Here’s an example of a wrapped AgentPanel to see all the pieces in place. We’ll call it SampleAgentPanel.cmp and suppose we added a static resource called StyledInsightPanel.
<aura:component implements="force:hasRecordId,force:hasSObjectName,flexipage:availableForRecordHome" access="global">
    <aura:attribute name="name" type="String" access="global" />
    <aura:attribute name="searchHub" type="String" access="global" />
    <aura:attribute name="title" type="String" access="global" />
    <aura:attribute name="recordFields" type="String" access="global" />
    <aura:attribute name="openResultsInSubTab" type="Boolean" default="false" access="global" />
    <aura:attribute name="fullSearchComponent" default="" type="String" access="global" />
    <aura:attribute name="debug" type="Boolean" default="false" access="global" />

    <ltng:require styles="{!$Resource.StyledInsightPanel + '/index.min.css'}"/>

    <CoveoV2:AgentPanel
        aura:id="AgentInsightPanel"
        recordId="{!v.recordId}"
        sObjectName="{!v.sObjectName}"
        name="{!v.name}"
        searchHub="{!v.searchHub}"
        title="{!v.title}"
        recordFields="{!v.recordFields}"
        openResultsInSubTab="{!v.openResultsInSubTab}"
        fullSearchComponent="{!v.fullSearchComponent}"
        debug="{!v.debug}"
        customScripts="{!$Resource.StyledInsightPanel + '/index.min.js'}"
    />
</aura:component>
Add your markup to a Visualforce Component
When you add the custom lightning component, there are some options which can be customized. The name option corresponds to the name of the Visualforce component that will be found and loaded. If no component exists, the default behavior is a component will be created and a pre-made layout will be added to it.
If you have a VisualForce component that you want to modify locally, you will want to copy the contents within the <apex:component > tags to your local page within the <body> tags and vice-versa. No modifications made in the <head> tag locally should be deployed to Salesforce.
As of CLI version 0.14.2 you can create templated pages that are ready to use (including the Coveo for Salesforce Local Development Kit), see CLI Reference - Create a Page
An example command to create an insight panel for Salesforce lightning would be as follows:
./node_modules/.bin/coveops create:page insight-panel --layout salesforce-agent-panelThis command will create a new
insight-panel.htmlpage with the markup that corresponds to the markup found in a new Insight Panel’s Visualforce component and is accessible at/insight-panel.htmlfrom your localhost.
The <apex:component > in the Visualforce component and <body> in the Turbo page can be interchanged one-per-one as long as both started from the same layout. There may be cases where the markup won’t have a one-to-one match. In these cases, the Coveo markup should follow by dedicated sections.
The most frequently customized sections include:
- The tab section, usually found within the
divcontaining thecoveo-tab-sectionclass. The code found therein is able to be surgically modified in both the local and Visualforce templates.

- The facet section, usually found within the
divcontaining thecoveo-facet-columnclass. The code found therein is able to be surgically modified in both the local and Visualforce templates.

- The result templates are usually found within the
divcontaining theCoveoResultListclass. The cpde found therein is able to be surgically modified in both the local and Visualforce templates - usually on a per result template basis. With the Coveo for Salesforce, differing components such asResultLinkandQuickviewdo not need to be modified between local and Visualforce templates.

An insight panel will have an additional
CoveoResultActionsMenucomponent under thedivwith thecoveo-result-frameclass:<script id="Sample" class="result-template" type="text/html" data-layout="list" data-field-fieldname="FieldValue"> <div class="coveo-result-frame"> <div class="CoveoResultActionsMenu"> <div class="CoveoAttachToCase" data-display-tooltip="true"></div> <div class="CoveoSalesforceQuickview"></div> <div class="CoveoResultActionsSendEmail"></div> <div class="CoveoResultActionsPostToFeed"></div> <div class="CoveoResultActionsSendLiveAgent"></div> </div> <div class="coveo-result-cell" style="vertical-align:top;text-align:center;width:32px;">
Adding the Salesforce Local Development Kit
With the Coveo for Salesforce Local Development Kit set up, ResultLink, Quickview components and the ResultMenu styling won’t break locally. In Salesforce you must always use the SalesforceQuickview, or corresponding SalesforceResultLink, ConsoleResultLink or AdaptiveResultLink.
The development kit is not an end-to-end solution and is meant to fill some common translation gaps that can lead to bugs and extra work if not accounted for.
Do not use it to test core Coveo for Salesforce functionalities outside the Salesforce environment. The kit will add local definitions for the following components so they can be used in markup outside of the Salesforce environment:
Salesforce JSUI Component Local JSUI Component Substituted SalesforceQuickview Quickview SalesforceResultLink ResultLink ConsoleResultLink ResultLink AdaptiveResultLink ResultLink
Deploying the Salesforce Solution
Once the translations are made in previous steps, the solution will be ready to deploy. You can use whichever tool you like to achieve this. Here’s some common approaches to consider.
Managing the changes directly within the sandbox
If you’re handling the Salesforce development directly in Salesforce then you will want to use the Developer Console to edit the Lightning and Visualforce components.
The Aura component is derived from this guide and is exclusively used in Salesforce for the purpose of configuring UIs within Salesforce’s visual editor. See Wrapping the Lightning Coveo component to include Static Resources.
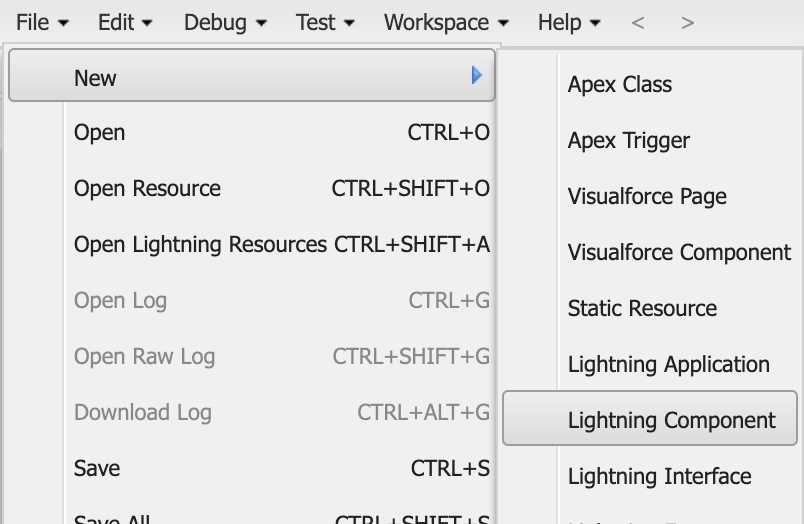
On Salesforce, the Aura Component is created as a new Lightning Component.
The Visualforce component is derived from the Turbo project’s page. See Add your markup to a Visualforce Component.
The Static Resource is derived from the Turbo’s output to dist. See Creating a Static Resource.
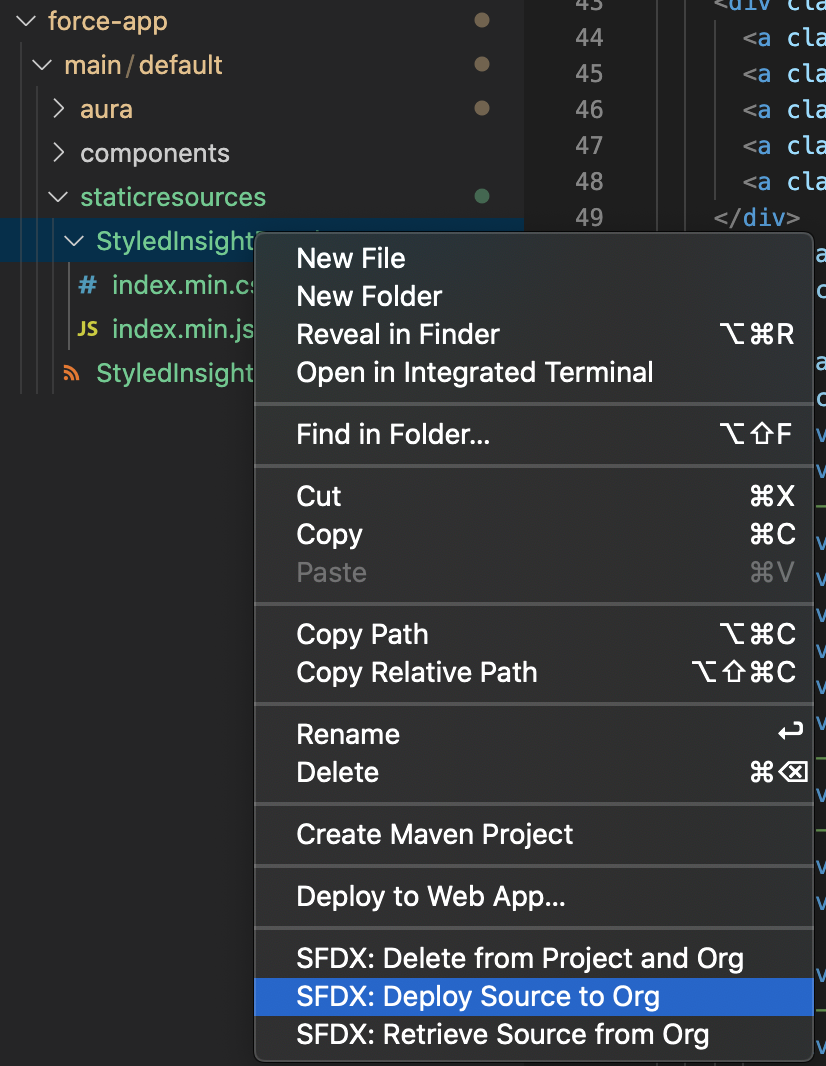
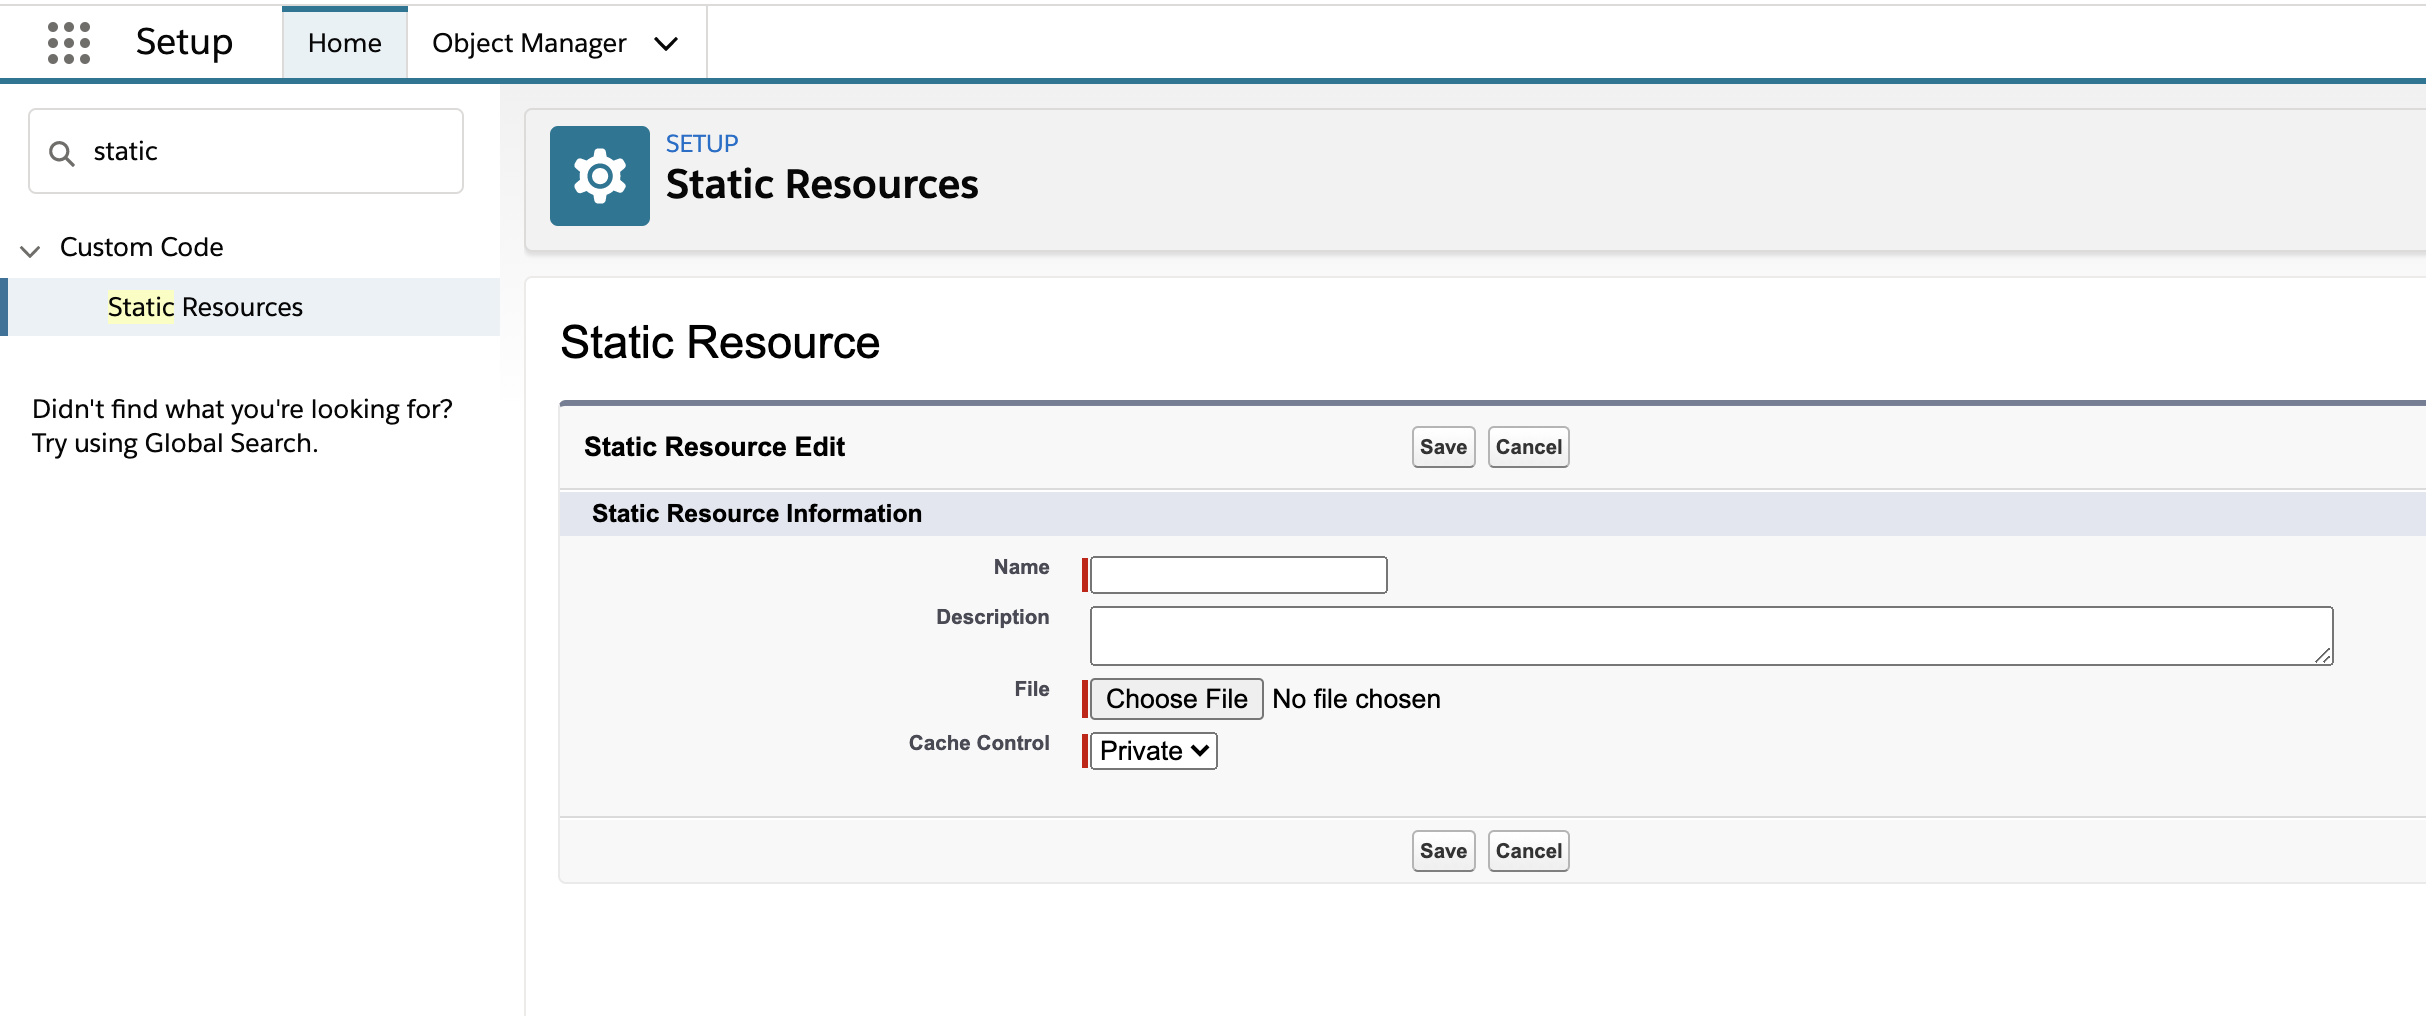
On Salesforce, the Static Resource is managed within Salesforce’s Setup. In order to upload a folder as a static resource, it must be compressed to a zip file. Navigate to the static resources page and fill in the form with the name being the name of the static resource you’re using within the Aura component.
Synchronizing local environments using sfdx and Visual Studio Code
If you’re using Visual Studio Code as your IDE, Salesforce has an extension pack that will take care of integrating sfdx into your IDE experience. The extension lets you browse and download resources from Salesforce, as well as create and deploy them from context menus.
To integrate Salesforce with Visual Studio Code, see Salesforce Extension Pack
Once installed and you’ve authenticated to the Salesforce Sandbox, you can use the context menu to manage deployment and retrieval of your Salesforce components.